Physical Address
304 North Cardinal St.
Dorchester Center, MA 02124
Physical Address
304 North Cardinal St.
Dorchester Center, MA 02124

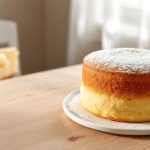
Sponge Cake: Learn the step-by-step process to bake a perfect, light, and fluffy sponge cake with this easy-to-follow guide. Perfect for beginners and seasoned bakers alike.
There’s something almost magical about a perfectly baked sponge cake. I’ve been obsessed with perfecting this classic dessert for years, and I’m thrilled to share everything I’ve learned along the way. The first time I successfully made a sponge cake that was light as air and perfectly moist, I felt like I’d unlocked a secret superpower in the kitchen. Whether you’re a complete beginner or looking to refine your technique, this comprehensive guide will walk you through every step of creating the perfect sponge cake.
A traditional sponge cake is deceptively simple—it relies on just a few basic ingredients, but the technique makes all the difference. I’ve tested countless variations and methods over the years, and I’m excited to share the foolproof approach that consistently delivers that signature airy texture that makes sponge cake so beloved worldwide.
Before we dive into the baking process, let’s take a moment to appreciate where sponge cake comes from. I’ve always found that understanding the history and science behind a recipe helps me connect more deeply with the baking process.
Sponge cake has been around for centuries, with early versions dating back to Renaissance Italy in the 15th century. What fascinates me is how this basic cake has evolved across different cultures while maintaining its essential character. The Victoria sponge cake, named after Queen Victoria who enjoyed a slice with afternoon tea, became an iconic British classic in the 1800s.
What makes sponge cake unique is its reliance on whipped eggs for structure rather than chemical leaveners like baking powder (though some modern recipes incorporate both). When I first learned this, it transformed my understanding of cake baking. The science is fascinating—when you whip eggs, you’re creating millions of tiny air bubbles that expand during baking, giving the sponge cake its characteristic light texture.
Different regions have their own variations: the Japanese kasutera, the French genoise, and the Italian pan di Spagna all represent unique approaches to the basic sponge cake concept. I’ve experimented with many of these variations and found that each offers something special, though they all share that distinctive airy quality.
After years of testing, I’ve found that the quality and balance of ingredients make all the difference in creating a superior sponge cake. Here’s what you’ll need for a classic recipe:
The best flour for sponge cake is typically cake flour, which has a lower protein content than all-purpose flour, resulting in a more tender crumb. However, I’ve found that carefully sifted all-purpose flour works wonderfully if that’s what you have on hand.
What surprised me when I first started baking sponge cakes was how few ingredients are actually needed. The magic happens in how you handle these simple components. Room temperature eggs whip up to a much greater volume than cold ones—I learned this the hard way after several disappointing attempts with eggs straight from the refrigerator.
The ratio of ingredients matters tremendously. Too much flour will weigh down your sponge cake, while too little won’t provide enough structure. I’ve tweaked these proportions countless times to arrive at what I believe is the perfect balance for a light yet stable cake.
Before we get to the actual baking, let’s make sure you have the right tools. I’ve found that proper equipment makes the process much smoother:
I once attempted to make a sponge cake without a proper mixer, using just a whisk and determination. Let’s just say the results were… humbling. The proper aeration of eggs is absolutely essential to sponge cake texture, and a good mixer makes this infinitely easier.
For sponge cake pans, I prefer using ones with removable bottoms or springform pans, as they make removal much easier. If you don’t have these, don’t worry—proper lining with parchment paper will help tremendously.
Now for the exciting part—actually making the sponge cake! I’ll walk you through my tried-and-tested method that has never failed me:
Preheat your oven to 350°F (175°C). This temperature is ideal for sponge cake baking as it allows the cake to rise properly without browning too quickly.
Prepare your pan by greasing it lightly and lining the bottom with parchment paper. I’ve found that just lining the bottom is sufficient—too much parchment can prevent the cake from climbing up the sides properly.
Make sure all your ingredients are at room temperature, especially the eggs. I sometimes place cold eggs in warm (not hot) water for about 5 minutes to bring them up to temperature quickly.
This is where the magic begins! Place your eggs and sugar in the bowl of your stand mixer (or use a hand mixer). Beat on medium speed for about 1 minute, then increase to high speed.
Continue beating for 7-9 minutes until the mixture reaches the “ribbon stage”—when you lift the beater, the batter should fall back into the bowl in thick ribbons that sit on the surface momentarily before sinking in. The mixture will be pale yellow, tripled in volume, and quite thick.
I cannot overstate how important this step is. The first few times I made sponge cake, I underwhipped my eggs, resulting in a dense, flat cake. Patience is key here—those air bubbles are the only leavening in a traditional sponge cake!
Once your egg mixture has reached the ribbon stage, gently fold in the vanilla extract or any other flavorings you’re using. I love experimenting with different flavor variations—a bit of lemon zest, a splash of rum, or even some matcha powder can transform a basic sponge cake into something extraordinary.
Sift the flour and salt together at least once before adding to ensure there are no lumps. Then, sift it again directly over your egg mixture in 2-3 batches.
Using a large rubber spatula, fold the flour in with a gentle cutting motion, bringing batter from the bottom of the bowl up and over the top. Rotate the bowl as you go. This technique preserves those precious air bubbles you worked so hard to create.
The first time I made sponge cake, I stirred the flour in as I would for a regular cake batter, and the result was disappointingly flat. Proper folding technique is crucial for maintaining volume.
If you’re making a butter sponge cake, which has a slightly richer flavor, take about ½ cup of the batter and mix it with the melted, cooled butter until combined. Then fold this mixture back into the main batter. This method prevents the butter from deflating the entire batter.
Pour the batter into your prepared pan, smoothing the top gently with your spatula. Don’t tap the pan to level it—this can knock out air bubbles.
Bake in the preheated oven for 25-30 minutes, or until the cake is golden on top and springs back when lightly touched. A toothpick inserted into the center should come out clean.
The sponge cake baking time can vary depending on your oven, so start checking at the 20-minute mark. I’ve found that opening the oven door before 20 minutes can cause the cake to sink, so resist the temptation to peek too early!
This step is just as important as the baking itself. Run a thin knife around the edges of the pan immediately after removing from the oven, then let the cake cool in the pan for about 10 minutes.
Invert the cake onto a cooling rack, peel off the parchment paper, and let it cool completely. Rushing this step can lead to a gummy texture or collapsed cake.
Even with the best instructions, things can sometimes go wrong. Here are solutions to common sponge cake issues I’ve encountered:
This has happened to me more times than I’d like to admit! The most common causes are:
If your sponge cake lacks that signature light texture, consider:
This frustrating problem usually stems from:
I once had a beautiful sponge cake completely tear apart because I forgot to line the pan properly. Now I have a pre-baking checklist I always follow!
Once you’ve mastered the basic sponge cake recipe, the possibilities for variations are endless! Here are some of my favorites that I’ve perfected over the years:
Fill your cooled sponge cake with a layer of strawberry jam and freshly whipped cream for this quintessential British treat. I love using homemade jam when strawberries are in season.
Replace 2 tablespoons of flour with cocoa powder for a light chocolate version. I find that Dutch-processed cocoa gives the best flavor without weighing down the texture.
Add the zest of one lemon to the batter and brush the baked cake with lemon syrup (equal parts lemon juice and sugar, heated until dissolved) for a refreshing twist. This variation is particularly wonderful in summer.
Dissolve 1 tablespoon of instant espresso powder in 1 tablespoon of hot water, cool, and fold into the batter. This makes an excellent base for tiramisu-inspired desserts.
Substitute the all-purpose flour with a good quality gluten-free flour blend. I’ve found that adding ¼ teaspoon of xanthan gum helps maintain the structure when baking gluten-free.
The beauty of sponge cake lies in its versatility as a base for countless fillings and frostings. Here are some sponge cake frosting ideas and fillings that I’ve found work particularly well:
Simple but perfect—sweetened whipped cream with a touch of vanilla is my go-to filling. For stability, I sometimes add a tablespoon of mascarpone to the cream.
Swiss meringue buttercream pairs beautifully with sponge cake without overwhelming its delicate texture. I prefer it to American buttercream, which can be too sweet.
Fresh berries, sliced peaches, or kiwi between layers add freshness and color. I often combine fresh fruit with a thin layer of complementary jam to prevent the cake from becoming soggy.
A silky vanilla custard makes for an elegant filling. I like to add a splash of liqueur to the custard for adult occasions.
For chocolate lovers, a simple ganache made from equal parts heavy cream and chocolate creates a luxurious topping or filling.
The key with any filling is to ensure it complements rather than overwhelms the delicate flavor and texture of the sponge cake. I’ve found that lighter fillings generally work better than very dense or heavy ones.
Knowing how to store sponge cake properly will ensure it stays fresh and delicious. Here’s what I’ve learned:
An unfilled sponge cake can be stored at room temperature, wrapped in plastic wrap, for 1-2 days. Once filled, especially with cream-based fillings, refrigeration is necessary.
Sponge cake freezes beautifully! I often bake sponge layers in advance and freeze them for up to 3 months. Wrap each layer individually in plastic wrap, then aluminum foil, and place in a freezer bag.
To thaw, unwrap and let come to room temperature for about 2 hours before filling and decorating.
Sponge cake is at its best when served at room temperature, so if refrigerated, allow it to sit out for about 30 minutes before serving.
A light dusting of powdered sugar is often all that’s needed for decoration, though fresh berries, edible flowers, or a drizzle of chocolate can add a special touch for occasions.
I’ve found that sponge cake pairs wonderfully with tea or coffee, making it perfect for afternoon gatherings. For dessert, a small scoop of ice cream or a fruit coulis can elevate it further.
Creating the perfect sponge cake is truly an art form that combines simple ingredients with precise technique. I’ve shared what works for me after years of trial and error, and I hope these tips help you achieve sponge cake success in your own kitchen.
Remember that even if your first attempt isn’t perfect, each sponge cake you bake teaches you something new. My early attempts were far from Instagram-worthy, but with practice, I’ve come to reliably create light, airy cakes that never fail to impress.
The beauty of sponge cake lies in its versatility—once you master the basic technique, you can adapt it endlessly with different flavors, fillings, and decorations. From humble afternoon tea to elaborate birthday celebrations, a well-made sponge cake is always appropriate and appreciated.
I’d love to hear about your sponge cake adventures! What variations have you tried? Any challenges you’ve overcome? The community of sponge cake enthusiasts is always growing, and sharing our experiences makes us all better bakers.
Happy baking, and may your sponge cakes always rise to perfection!