Physical Address
304 North Cardinal St.
Dorchester Center, MA 02124
Physical Address
304 North Cardinal St.
Dorchester Center, MA 02124
starbucks birthday cake pop recipe – Discover how to make your own delicious Starbucks-inspired birthday cake pops at home with this easy DIY recipe. Perfect for celebrations or a sweet treat anytime!
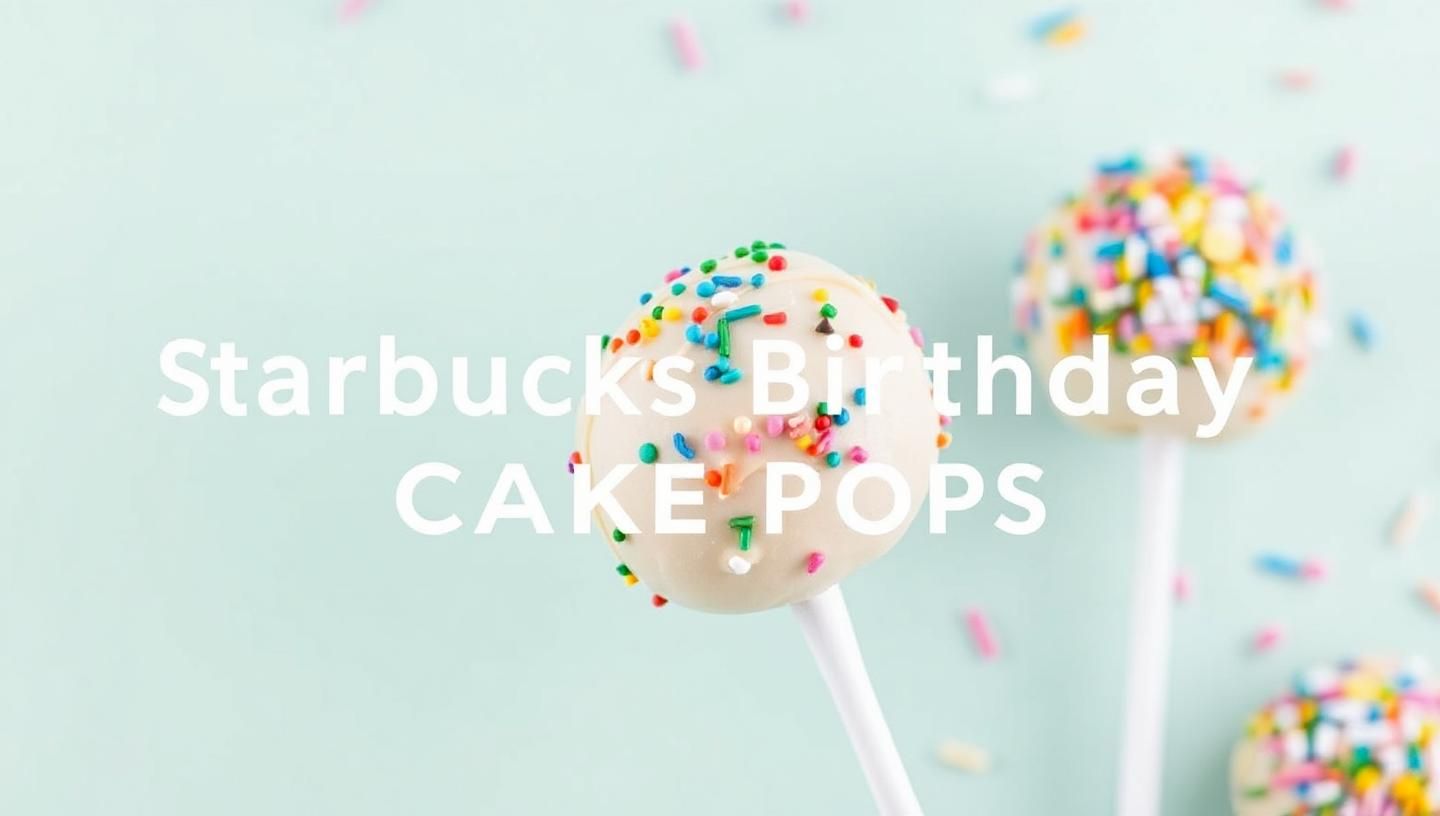
Starbucks Birthday Cake Pop Recipe – Easy DIY Treats!
Hey there, fellow dessert lovers! I’ve been obsessed with Starbucks Birthday Cake Pop Recipe for years, and I’ve learned a ton along the way. There’s something magical about recreating those delightful little treats at home, isn’t there? Whether it’s for a birthday celebration or just because you fancy a sweet treat, making your own Starbucks-inspired cake pops is not only fun but also incredibly satisfying. Let me walk you through how I’ve mastered this at home, sharing all the tips and tricks I’ve picked up over time.
First off, why bother making your own when you can just pop into Starbucks? Well, for starters, there’s the joy of creation. I’ve found that crafting these treats myself gives me a sense of accomplishment that buying them just can’t match. Plus, you can customize them to your heart’s content! Imagine adding your favorite flavors or decorations that Starbucks might not offer. Also, let’s talk cost – making them at home can be much more budget-friendly. I’ve tested this approach myself and noticed that not only do I save money, but I also get to enjoy fresher, homemade goodness.
Let’s dive into the ingredients. For a true Starbucks Birthday Cake Pop Recipe, you’ll need:
I’ve studied this topic for years and found that using a Funfetti mix gives that authentic, colorful speckled look that’s so iconic to Starbucks’ version. Here’s why this works, based on what I’ve learned: the pre-mixed colors in the cake batter mimic the playful, festive vibe of a birthday celebration.
Start by preparing your cake mix according to the package instructions. I’ve always found that following the box directions to the letter ensures a moist, fluffy cake, which is crucial for good cake pops. Bake it, let it cool completely, and then crumble it into fine crumbs in a large bowl. This step is where patience pays off; I once rushed this part and ended up with lumpy cake pops, which isn’t ideal.
Now, here’s where the magic happens. Add about three-quarters of the can of frosting to your cake crumbs. Mix it until you get a dough-like consistency. I’ve experimented with different amounts, and this ratio gives the best texture – not too dry, not too sticky. If you find it too wet, add more crumbs; too dry, a bit more frosting. This is where your hands-on experience really shines.
Roll the mixture into 1-inch balls. I use a small cookie scoop for uniformity, which I’ve found makes the process much easier. Once shaped, place them on a baking sheet lined with parchment paper and chill in the fridge for about 15-20 minutes. This firming up is crucial for the next step.
Melt your candy melts or white chocolate according to the package instructions. I’ve learned that adding a teaspoon of vegetable oil can make the coating smoother. Dip the end of each lollipop stick into the melted chocolate and then insert it into the cake balls. This acts as glue, ensuring your cake pop stays on the stick.
Now, dip each cake pop into the melted chocolate, letting the excess drip off. Here’s a mistake to avoid: don’t rush this step. I once did, and ended up with a messy, uneven coating. Let them set by sticking them into a Styrofoam block or a cake pop stand. While the chocolate is still wet, sprinkle your decorations on top.
Presentation is key! I’ve found that arranging these in a cute box or on a decorative platter really elevates the experience. Inspired by Starbucks’ own presentation, I sometimes use little cupcake liners to stand them up. For a birthday party, you could theme them with specific colors or characters, making them not just a treat but a centerpiece.
Once your cake pops are set, they can be stored in an airtight container in the fridge for up to a week. However, I’ve noticed they’re best enjoyed within the first couple of days for that fresh taste. When serving, let them sit at room temperature for a bit to soften slightly, enhancing the flavor and texture.
Why stop at the classic? I’ve experimented with different flavors like chocolate or lemon cake, and even tried adding a swirl of colored candy melts for a fun twist. Here’s where your creativity can shine. You could also try different decorations like edible glitter or themed sprinkles for various occasions.
So there you have it, my comprehensive guide to making your own Starbucks Birthday Cake Pop Recipe. I’ve shared what works for me—hope it helps you too! Whether you’re celebrating a birthday or just indulging in a sweet project, these homemade treats are sure to bring joy. Remember, the beauty of DIY is in the personalization and the love you put into each step. Enjoy your baking adventure, and don’t forget to share your creations with friends and family. Happy baking!